
Explore the AR Foundation Tutorial: A Comprehensive Guide
Augmented Reality (AR) has become a revolutionary technology, transforming the way we interact with the digital world. One of the most popular tools for AR development is the AR Foundation, which provides a robust framework for creating immersive AR experiences. Whether you’re a beginner or an experienced developer, this tutorial will guide you through the ins and outs of the AR Foundation, helping you to create stunning AR applications.
Understanding the AR Foundation

The AR Foundation is an open-source, cross-platform framework developed by Unity Technologies. It is designed to simplify the development of AR applications by providing a set of tools and functionalities that handle the complexities of AR development. By using the AR Foundation, you can focus on creating engaging AR experiences without worrying about the underlying technical details.
One of the key features of the AR Foundation is its support for various AR platforms, including ARKit, ARCore, and Windows Mixed Reality. This allows you to create AR applications that can run on a wide range of devices, from smartphones and tablets to VR headsets and AR glasses.
Setting Up Your Development Environment
Before you dive into the AR Foundation tutorial, you need to set up your development environment. Here’s a step-by-step guide to get you started:
-
Download and install Unity Hub from the Unity website.
-
Open Unity Hub and create a new project.
-
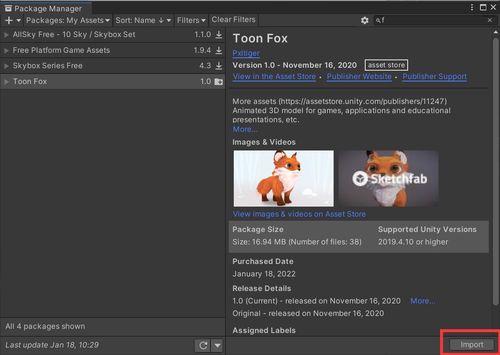
Select the AR Foundation template for your project.
-
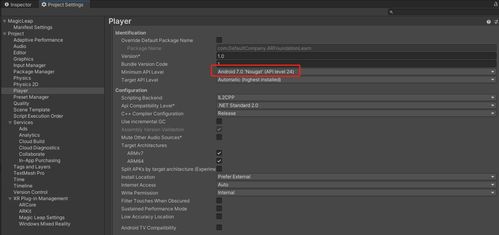
Choose the appropriate AR platform for your project (ARKit, ARCore, or Windows Mixed Reality).
-
Click “Create” to generate your project.
Once your project is set up, you’ll be ready to start exploring the AR Foundation.
Exploring the AR Foundation API
The AR Foundation API provides a wide range of functionalities for AR development. Here are some of the key components you’ll encounter:
| Component | Description |
|---|---|
| ARSession | Manages the AR session and handles the interaction between the AR device and the application. |
| ARSessionOrigin | Represents the origin of the AR session and provides a reference point for placing AR objects in the real world. |
| ARSessionTrackingState | Indicates the current tracking state of the AR session, such as whether it is tracking or not. |
| ARPlane | Represents an AR plane detected by the AR session. |
| ARAnchor | Represents an AR object placed in the real world, such as an AR marker or a virtual object. |
These components work together to provide a seamless AR experience. For example, you can use the ARSessionOrigin to place virtual objects on AR planes, and the ARAnchor to track the position and orientation of those objects over time.
Creating Your First AR Application
Now that you have a basic understanding of the AR Foundation API, let’s create your first AR application. Follow these steps:
-
In the Unity Editor, create a new GameObject called “ARCamera” and assign it the ARSessionOrigin component.
-
Drag and drop an ARPlaneManager component onto the ARCamera GameObject.
-
Drag and drop an ARAnchorManager component onto the ARCamera GameObject.
-
Drag and drop a simple 3D model onto the ARCamera GameObject.
-
Adjust the position, rotation, and scale of the 3D model to your liking.
-
Build and run your project on an AR-compatible device.
With these steps, you should now see your 3D model placed on an AR plane in the real world. Congratulations, you’ve just created your first AR application using the AR Foundation!
Advanced Techniques
Once you’ve mastered the


